How to create a lightbox in WordPress


If you’ve got high-quality photos, video, infographics, or even a must-see graph, display them in their full glory — with a lightbox on your website!
When someone clicks on an image, the lightbox provides them with a high-quality, full-size version with any non-media page elements blackened out. The result? Your visitors get a much-improved viewing experience with minimum distractions and no more squinting at tiny images (a real bonus for mobile browsing).
Lightboxes are definitely the way forward to instantly capture your visitor’s attention,, and with this short tutorial, you’ll be able to create a lightbox for your WordPress site in just a few minutes.
What’s a Lightbox?
A lightbox is an overlay, or a pop-up window that appears on posts and pages to show a smaller image in full-size. When clicked, the media appears on your screen, and the background (any non-media elements) is blurred or darkened. With all visual distractions removed, the lightbox pop-up stands out, switching the main focus to the image, or your message, instead.
The most common way to use a lightbox is to display high-quality images on your blog at their full size. They are elegant and easy to implement, and they give your website a nice, professional look and feel. Plus, they keep your visitors on the current page because now there’s no need for them to leave!

When to use a lightbox
Lightboxes are predominately for showcasing images, but they are handy for many other reasons. They’re a great way for e-commerce sites to present products and boost sales. Or to give a preview of several pages of an ebook or add an opt-in form for collecting emails and newsletter signups.
If you want to get creative, you can also use a lightbox gallery to link to-out to off-site projects and video content. Yes, it’s even possible to add curated as well as original content to your website using a lightbox.
Add Lightboxes to Your WordPress Website
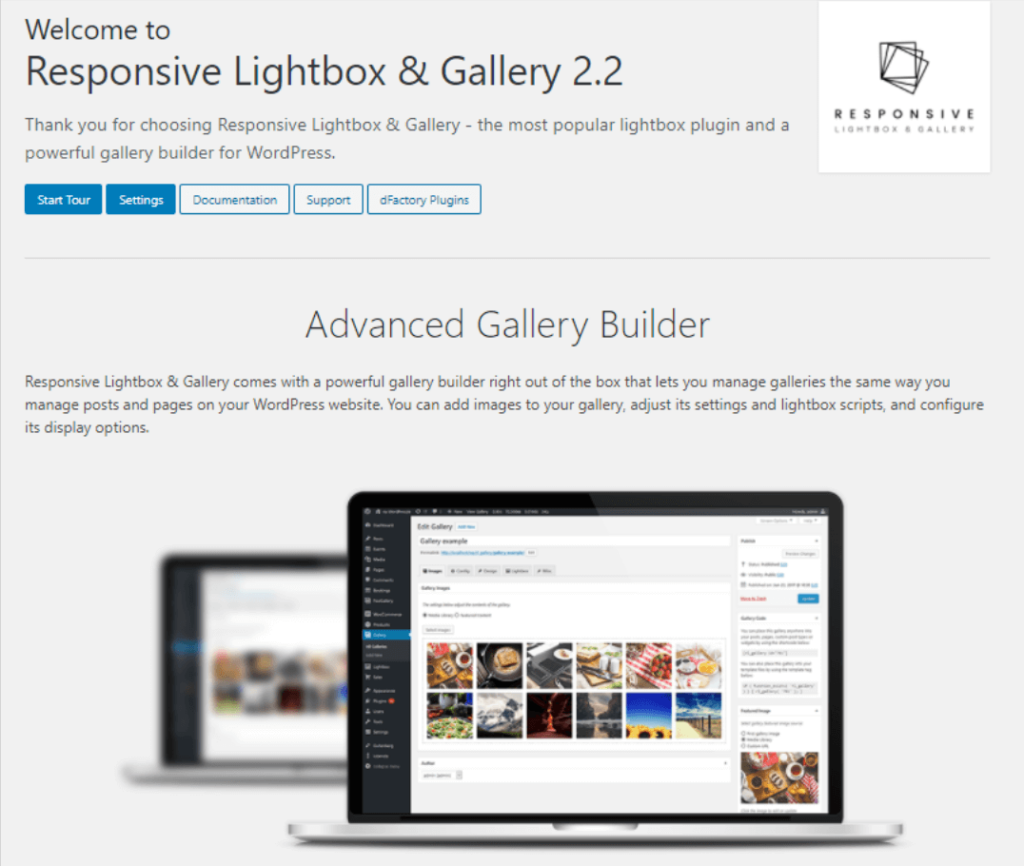
As with most things in WordPress, the quickest way to get this show on the road is with a plugin. To set up a lightbox, there are many dedicated WordPress lightbox plugins. To keep it simple, we’ll use the straightforward (and free) Responsive Lightbox & Gallery plugin by dFactory for this demo.
We recommend the Responsive Lightbox & Gallery because it’s the most highly-rated of the free WordPress lightbox plugins available right now. It comes with various lightbox designs, and it’s made to fit any mobile screen — so you won’t have to worry about people viewing your content across different devices.
Create Your Lightbox
To begin, install and activate the plugin. Now click Start Tour if you’re interested in a short (but impressively thorough) walkthrough.
Now’s the time to add some images to your gallery. To avoid confusion, we leave the Lightbox settings tab open and open the Gallery tab as pictured in the screenshot below:
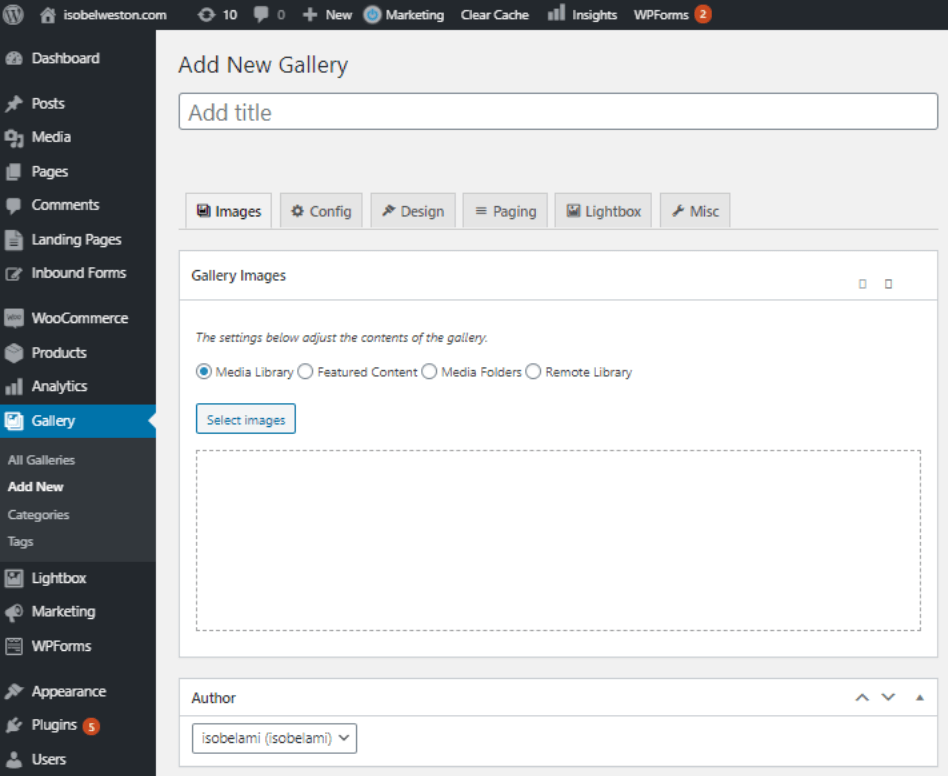
Over the next few steps, we’ll walk through how to make a basic lightbox.
- Start by giving your gallery a meaningful name. We’re using “Puppies” because we’re using stock photos of Puppies for this example.
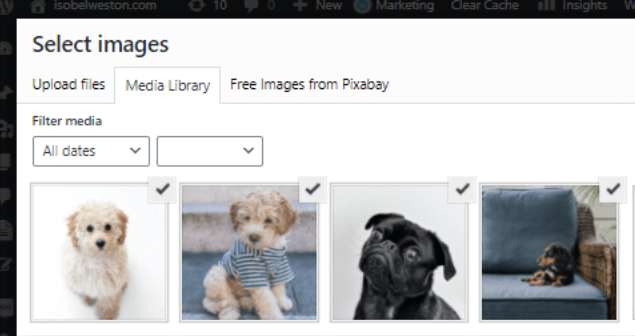
- Look at the text boxes below, and you’ll notice four options to pull your images from. For this demo, we’re using “Media Library,” which works just like the native WordPress Gallery. You can select multiple images at once from your website’s Media Library or upload new ones.
- Once you’ve decided where to draw images from, click Select images to upload new images or add existing images from your WordPress media library.
Tip: There’s also the option to add free pictures from PixaBay if you’re short of your own. Sticking with the animal theme, here’s an example search for free, quality images of “Cows” to add to your gallery.
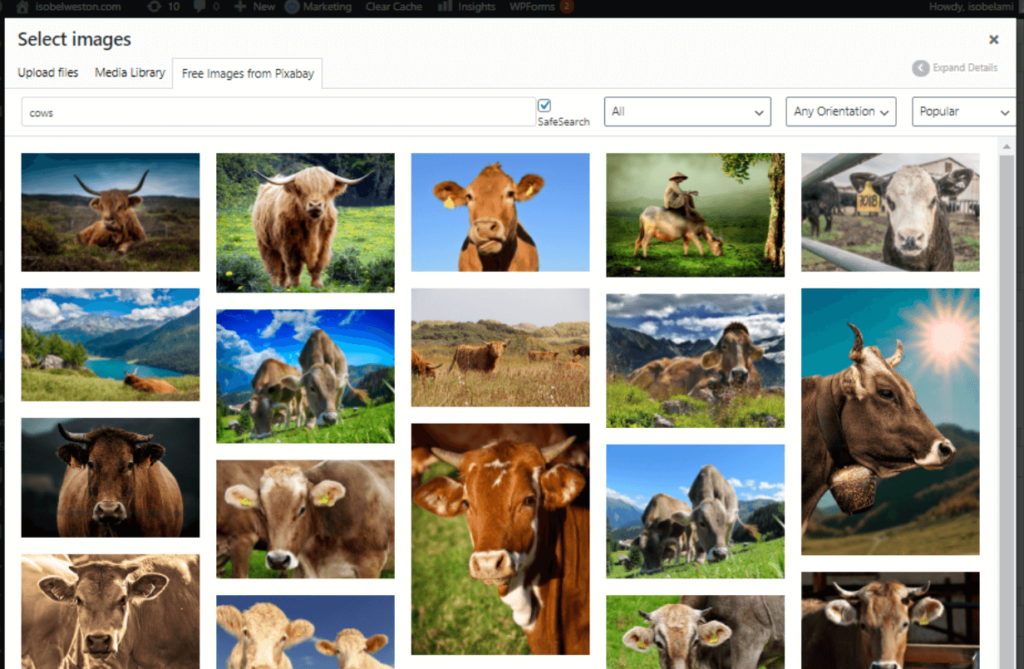
- Select “Use these images” once you’re happy with your selection.
- Your images are now available in the Gallery Images section. If you’re not happy with the order, drag and drop them into the desired positions.
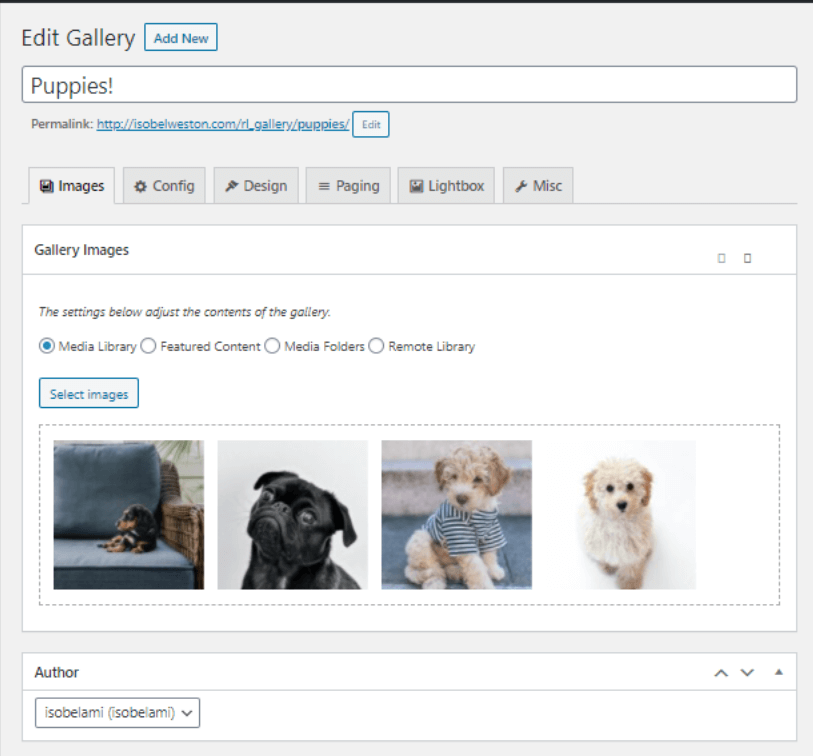
- To edit or delete images, hover over it to reveal several new options. If you wish to add a title, caption, alt text, or description to an image, click the Edit image option. To remove images, click the respective option in the top-right corner of the image.
- At this point, you’ve created a lightbox. It really is as simple as that. You can save your changes and skip to the next section to add your lightbox to your posts or pages. Alternatively, you can make some unique thanks to the plugin’s room for customization.
Customize Your Lightbox
To add design elements and customization, browse through the available tabs to get the most out of the plugin. I’d recommend checking out the official documentation for more details on exactly what’s possible with each tab. Here’s a quick run-through:
Configuration tab — Choose which style of gallery you want. You’ve got four options: Global (Basic Grid), Basic Grid, Basic Slider, or Basic Masonry.
Design tab — Get creative with your gallery’s design effects and colors.
Paging tab — With this tab, you can define the pagination type, the number of images displayed per page, and their position.
Lightbox tab — Here you add a caption and title, as well as adjust the image size.
Misc. tab — Configure some extra settings and add custom classes and a Gallery description.
Finally, you can assign a Featured image. To do this, go back to the first tab (images).

Insert Your Lightbox
Having designed your gallery, it’s time to add it to your posts or pages as a lightbox. The simplest way is to just paste the shortcode into your edit screen like so:
- From your WordPress admin, click through to Gallery > All Galleries
- Copy the shortcode from the Shortcode column
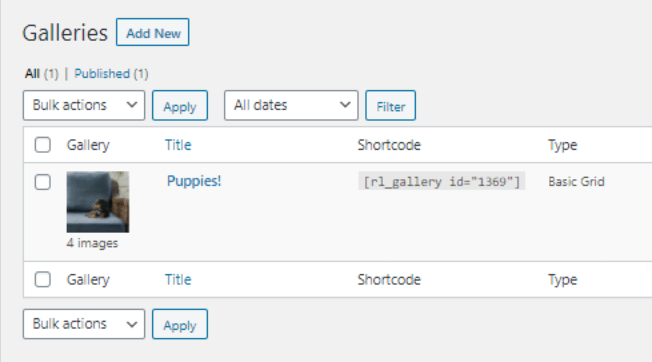
- Open the page or posts that will feature the lightbox and paste the shortcode into the text editor block directly, just like in the example below.
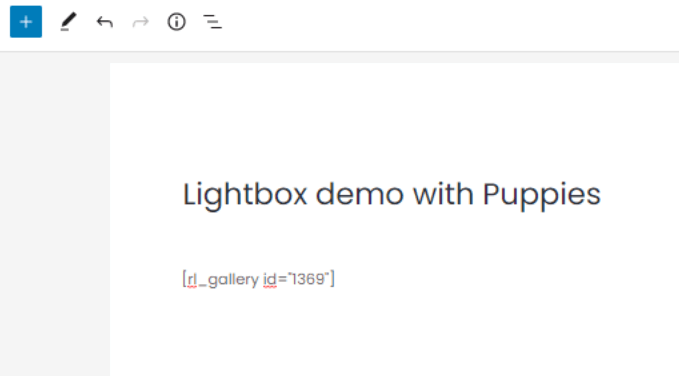
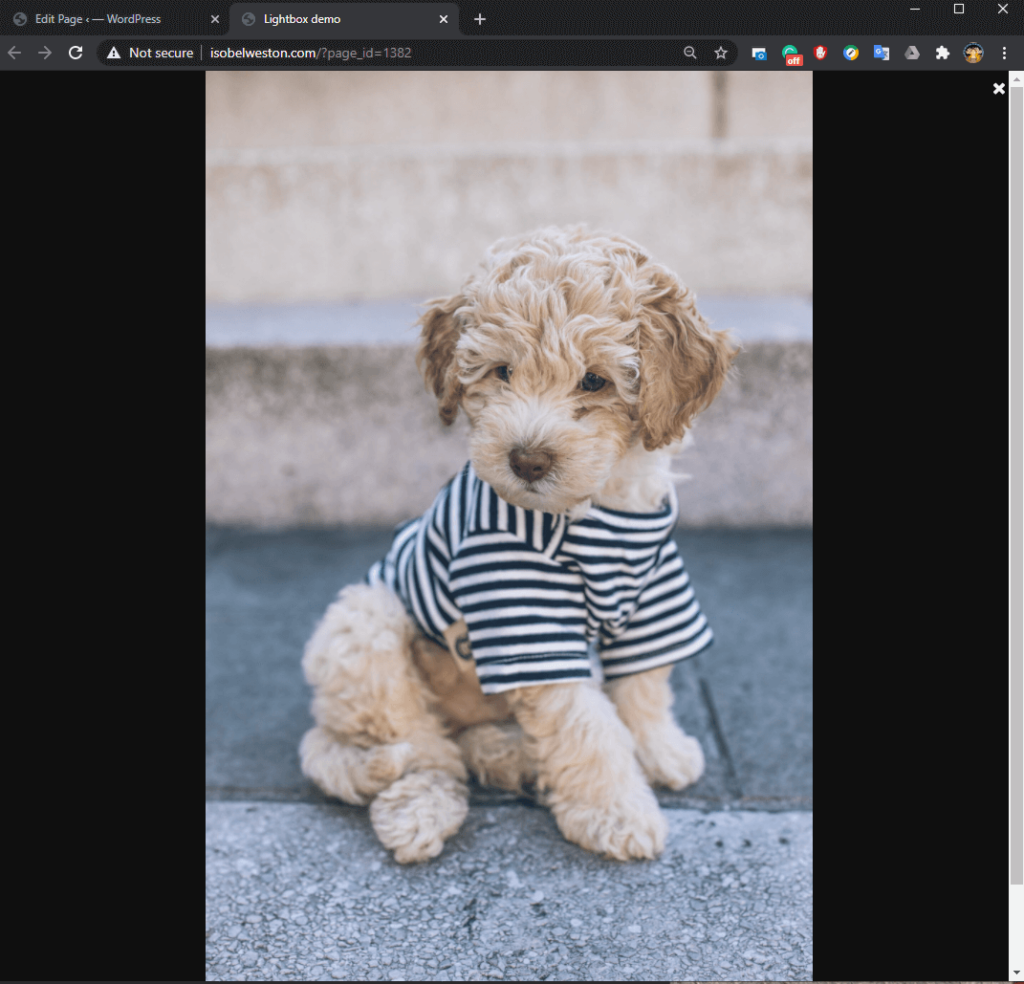
Save your changes and check out your new lightbox. Here’s how ours turned out:

- Try clicking on an image to see how it looks in full size with no other visible on-page distractions. Notice the navigation options to exit the pop-up screen or scroll to the next full-size gallery image.
Don’t Forget to Have Fun!
With a lightbox, you can give your visitors a far better experience while viewing your content. Now your images get the attention they deserve, without anyone having to squint or feel put off by having to zoom into pixelated versions on their mobile devices.
By following this easy tutorial, you have the skills to create a basic lightbox in WordPress out-the-box, and to assemble something more advanced with a plugin. Now’s the time to have some fun with it! The Responsive Lightbox & Gallery plugin offers plenty of scope to customize your lightbox and make it into something truly unique for your WordPress site.
Do you have any tips and tricks on how to make awesome lightboxes? Perhaps you have a favorite lightbox plugin? Let us know in the comments below!
