Mastering Google Search Console: A step-by-step guide for your WordPress site


As a website owner, you’re likely always looking for ways to improve your website’s visibility in search engines. One tool that can help propel your ranking is Google Search Console (GSC). In this article, we will look at why adding this free service to your WordPress site is essential. Plus, you’ll learn how to add your website to Google Search Console and explore some of its best features, such as monitoring backlinks and using Core Web Vitals to meet Google’s standards.
Why add Google Search Console to your WordPress site?
Adding your WordPress site to Google Search Console is essential in improving your website’s search engine visibility. The tool, which is great for improving your SEO, provides valuable insights into how Google crawls and indexes your website. What’s more, it provides you with information on technical issues that could impact your website’s visibility.
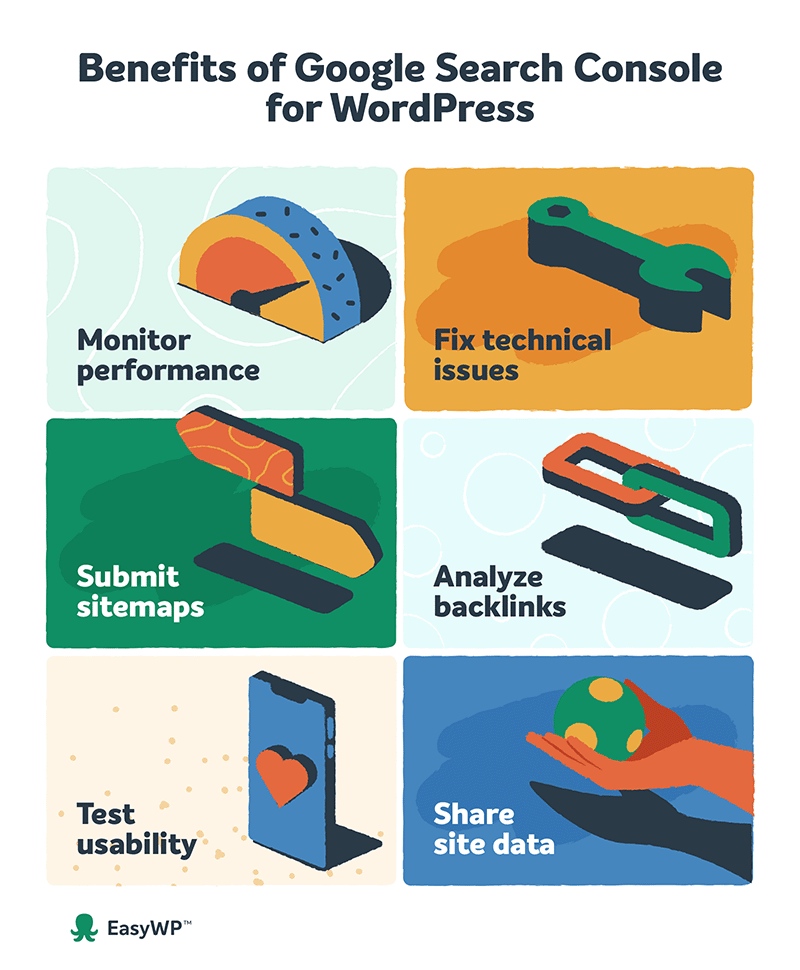
By adding your website to Google Search Console, you can:
- Monitor your website’s performance in search results.
- Identify and fix technical issues that could impact your site’s visibility.
- Submit sitemaps and individual URLs for crawling.
- Monitor and analyze backlinks to your website.
- Test and improve your website’s mobile usability.
- Share Google organic insights with your entire team.
How to add your website to Google Search Console
Adding your website to Google Search Console is a relatively simple process. Here are the steps you need to follow:
- Go to the Google Search Console website.
- Click “Start Now.”
- Sign in with your Google account. Click “Add a property.”
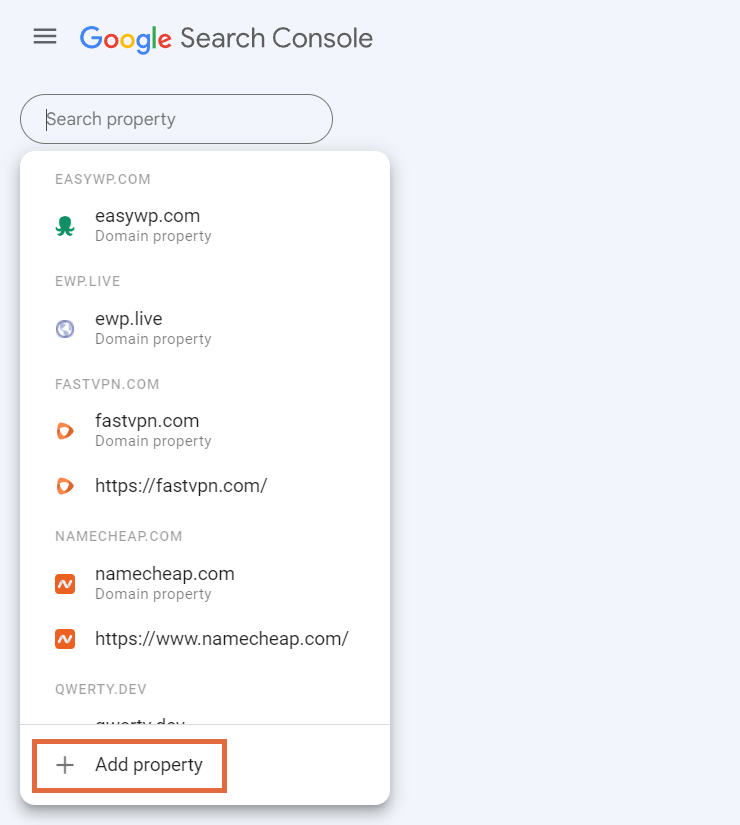
- Enter your website’s URL and hit “Continue.”
- Select a verification method.
- Follow the instructions for the verification method you’ve chosen.
- Once your website is verified, you will be taken to the Google Search Console dashboard.
Site verification methods for Google Search Console
There are several site verification methods that you can use to verify your website with Google Search Console. Here are some of the most common ways:
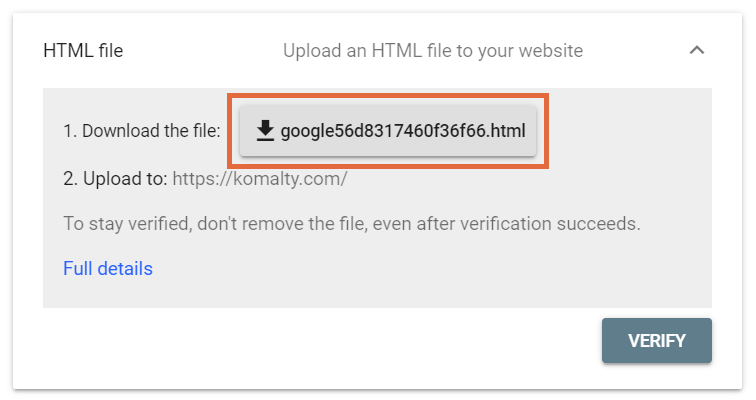
HTML file upload
This method involves uploading an HTML file to your website’s root directory. Google will then check for the presence of this file to verify that you own the website. This method isn’t used that often by beginner users and is most familiar to web developers.
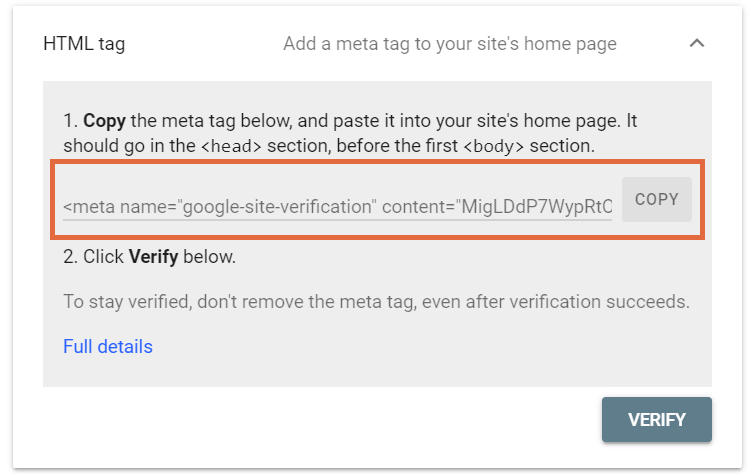
HTML tag
This method involves adding a meta tag to the header of your website’s homepage. Google will then check for the presence of this meta tag to verify that you own the website. This is a relatively easy verification method and is popular among WordPress users. Several popular SEO and data analytics plugins for WordPress use this verification method to integrate GSC.
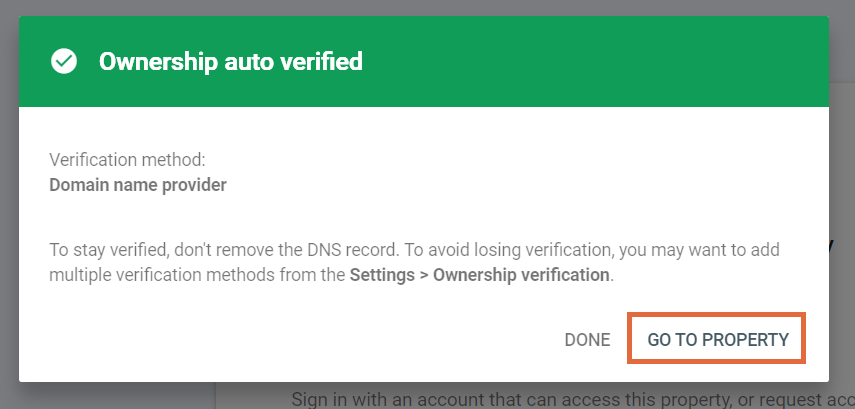
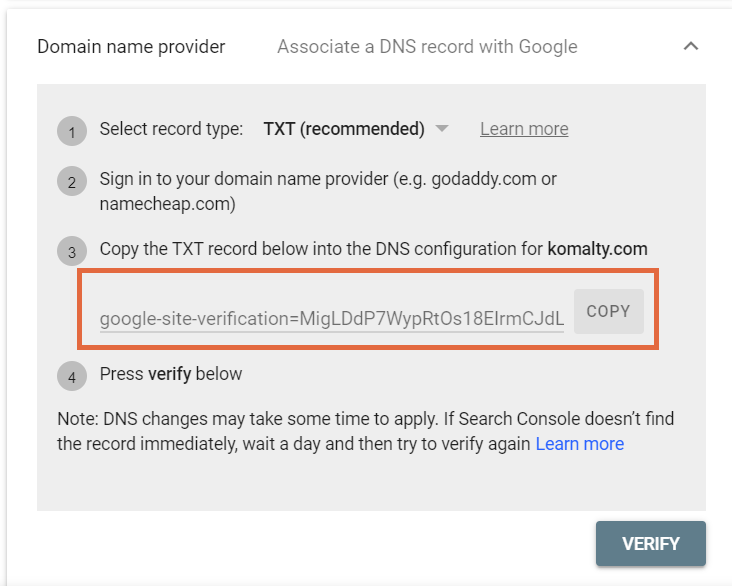
Domain name provider
If your domain name provider is supported, you can verify your website by signing in to your provider and granting Google access to your account. This method is helpful for people who frequently manage their domain and hosting settings or teams using DNS records to manage verifications for multiple websites.
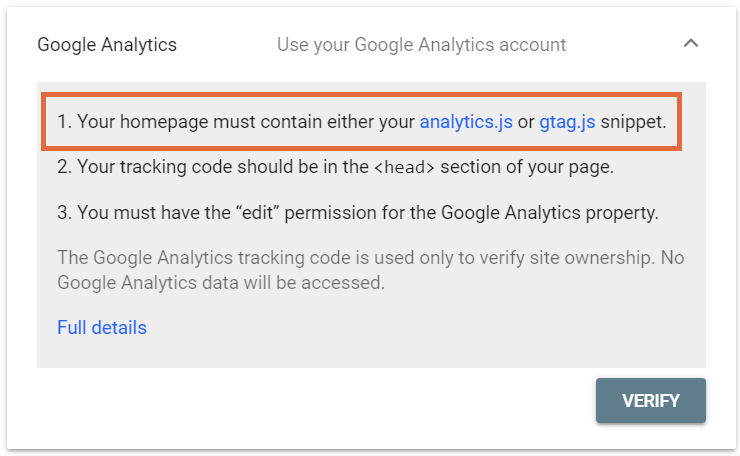
Google Analytics and Tag Manager
If you have Google Analytics set up for your website, you can verify your website by linking your Google Analytics account to Google Search Console. This method is beneficial to those who are already using Google Analytics and Tag Manager and want to add GSC tools to the mix.
Understanding XML sitemaps and robots.txt files
XML sitemaps and robots.txt files are two critical files that can help you optimize your website for search engines. Here is a brief overview of what these files are and how they work:
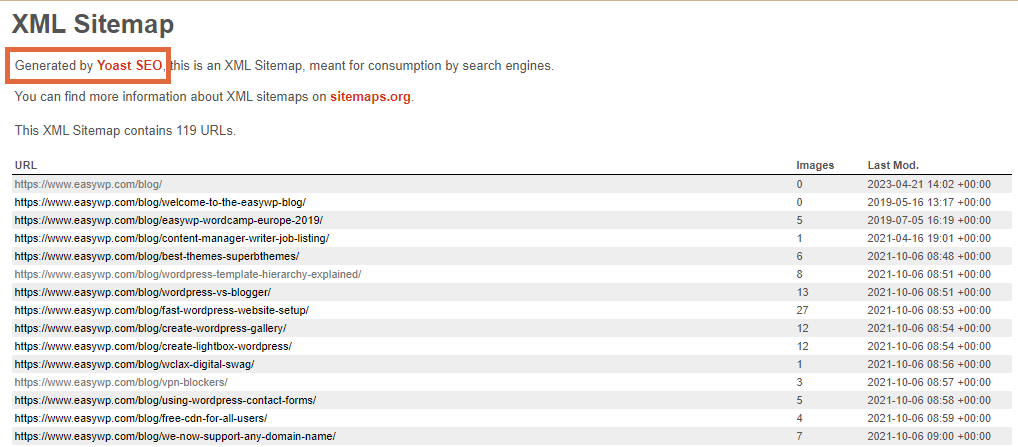
XML sitemaps
An XML sitemap is a file that lists all of the pages on your website that you want search engines to crawl and index. By submitting an XML sitemap to Google Search Console, you can ensure that Google crawls and indexes all of the pages on your website that you want to appear in search results. Plugins such as Yoast SEO can generate sitemaps for you automatically.
Robots.txt files
A robots.txt file is a file that tells search engine crawlers which pages on your website they are allowed to crawl and index. By using a robots.txt file, you can prevent search engine crawlers from crawling and indexing pages on your website that you do not want to appear in search results.
While you won’t find a robots.txt dashboard inside GSC, following best practices for uploading a robots.txt file helps your site communicate effectively with Google’s crawlers.
Testing your website’s rich results with Google’s Rich Results Test
Rich search results include additional information, such as images, ratings, and reviews. Google’s Rich Results Test is a tool that allows you to test your website’s rich results to ensure that they are working correctly.
To use the Rich Results Test, simply enter the page URL you want to test and click the “Test URL” button. The tool will then analyze the page and provide you with a report that shows whether your page is eligible for rich results and identifies any errors that need to be fixed.
Monitoring backlinks with Google Search Console
Backlinks are links from other websites that point to pages on your website. Monitoring backlinks is vital because it can help you identify opportunities to improve your website’s search engine visibility.
Google Search Console allows you to monitor and analyze the backlinks to your website. To view your website’s backlinks, navigate to the “Links” section of the Google Search Console dashboard.
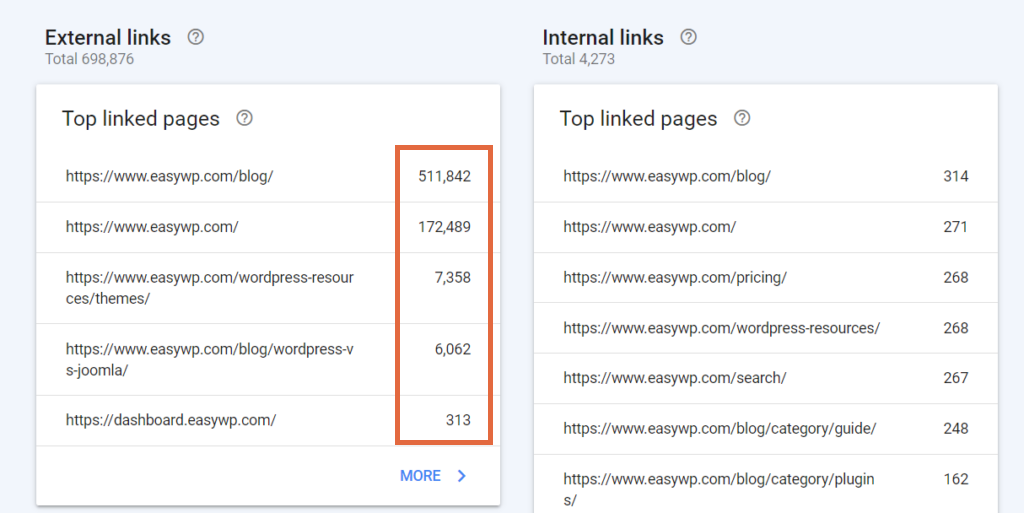
Monitoring backlinks with Google Search Console is essential for any website owner or digital marketer. Backlinks are one of the most critical factors in determining a website’s SEO performance. Quality links from high-authority websites can significantly improve a website’s search engine rankings. However, bad or spammy links can harm a website’s ranking and reputation. Therefore, it is crucial to check for backlinks using Google Search Console regularly.
When monitoring backlinks, the first thing to check for is the number of links. The more links a website has, the better it is for SEO. However, it’s also essential to check the quality of these links. You’ll need to use a third-party tool such as SEMRush or Ahrefs to determine backlink quality.
Another thing to check for is the relevance of the linking website. Backlinks from relevant websites that are in the same industry or niche are more valuable than links from irrelevant websites. It is also essential to check the anchor text used in the link. Anchor text should be relevant and descriptive rather than generic or spammy.
Understanding Core Web Vitals for WordPress
Core Web Vitals is a set of metrics that Google uses to measure the user experience on your website, for both mobile and desktop users. These metrics include:
- Largest Contentful Paint (LCP): measures loading performance
- First Input Delay (FID): evaluates interactivity
- Cumulative Layout Shift (CLS): monitors visual stability
You can use the Core Web Vitals report in Google Search Console to ensure that your website meets Google’s standards. Using these tools, you can discover slow-loading resources and images that need to be optimized.
You must keep in mind, however, that all websites are different, and simply “fixing” the warnings found in Core Web Vitals does not fix search ranking issues. You should consider Core Web Vitals as just one part of the site optimization process.
Using Google Site Kit for WordPress
Site Kit by Google is a WordPress plugin connecting your website to various Google services, including Google Search Console, Google Analytics, and AdSense. You can access essential data from these services directly from your WordPress dashboard using Google Site Kit.
To install:
- Click Plugins > Add New.
- Search for Site Kit by Google in the WordPress plugin library.
- Install and activate Site Kit by Google.
- Connect Site Kit to your Google account. If there are multiple WordPress admins, each admin must connect their own Google account to see data.
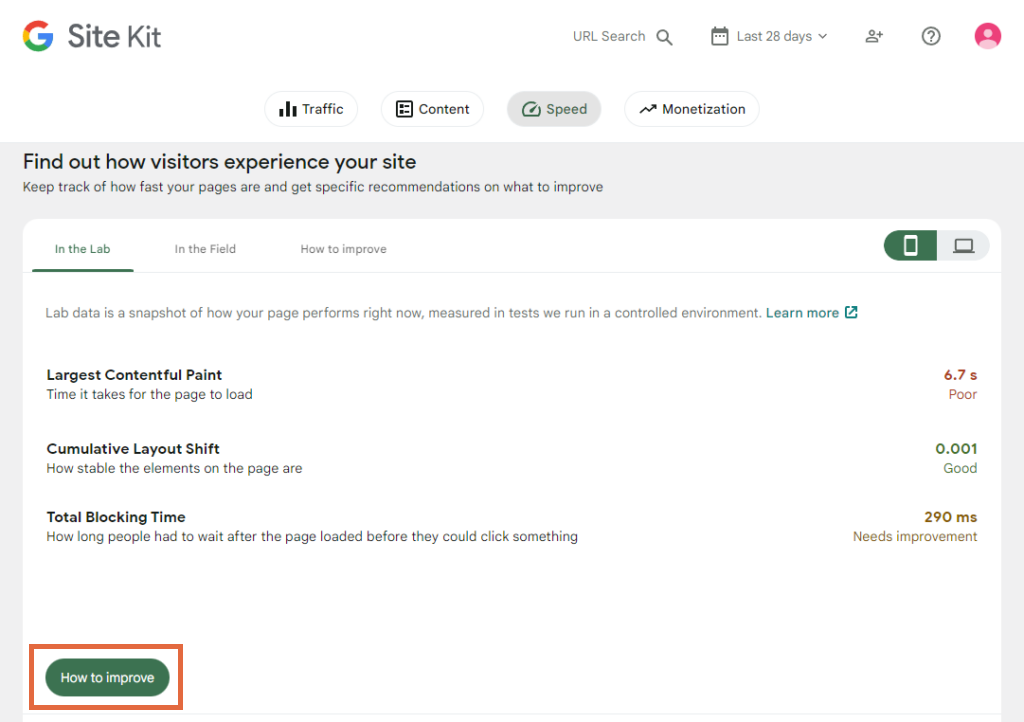
Once installed, Site Kit will combine data from multiple Google tools into one dashboard. Often, you can click through to resources on improving your results with a button shown right in the dashboard.
Adding users to Google Search Console
Adding users to Google Search Console allows you to give access to other authorized individuals to view and analyze your website’s traffic data.
One way to add users is by clicking on the settings cog in the lower left corner of your Search Console dashboard and selecting “Users and permissions.”
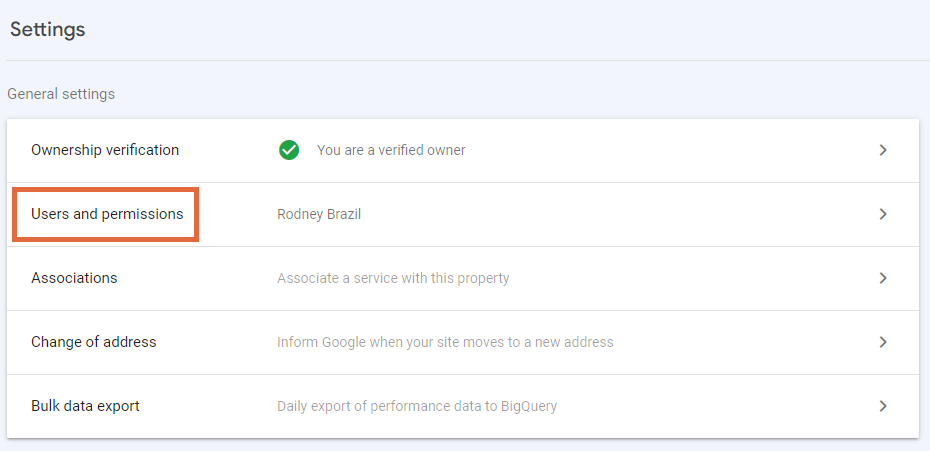
From there, you can add a new user by clicking on the “Add user” button and entering their email address. You can also choose to give them full or restricted access to your data.

It’s important to note that adding users does not automatically grant them access to your website’s data. They will need to verify their access by clicking on the link sent to them via email.
Submitting your website to other search engines
While Google is the most popular search engine, there are other search engines where you can submit your website. You can submit your site and gain search data from all the following search engines by submitting your site to Bing Webmaster Tools:
- Bing
- Yahoo
- DuckDuckGo
- AOL
- Amazon Alexa
Dozens of small, upstart search engines have launched with the goal of taking some of Google’s market share. While their user base currently remains small, Brave Search and Neeva also allow sites to submit their content for indexing.
A world-class tool for WordPress
Google Search Console is a powerful tool that can help you improve your website’s search engine visibility. Adding your WordPress site to Google Search Console and using the various features available allows you to monitor your website’s performance, identify and fix technical issues, and improve your user experience.
If you haven’t already, take the time to add your WordPress website to Google Search Console today and start reaping the benefits. Then, check out our guide to keyword tracking and maintaining site success over time.
